Within the reports module you will find the additional tasks manager. Here you can add the tasks you have performed on the web to be included in the reports you create for your customers.
Here we explain how to get the most out of this functionality.
Accessing the task manager
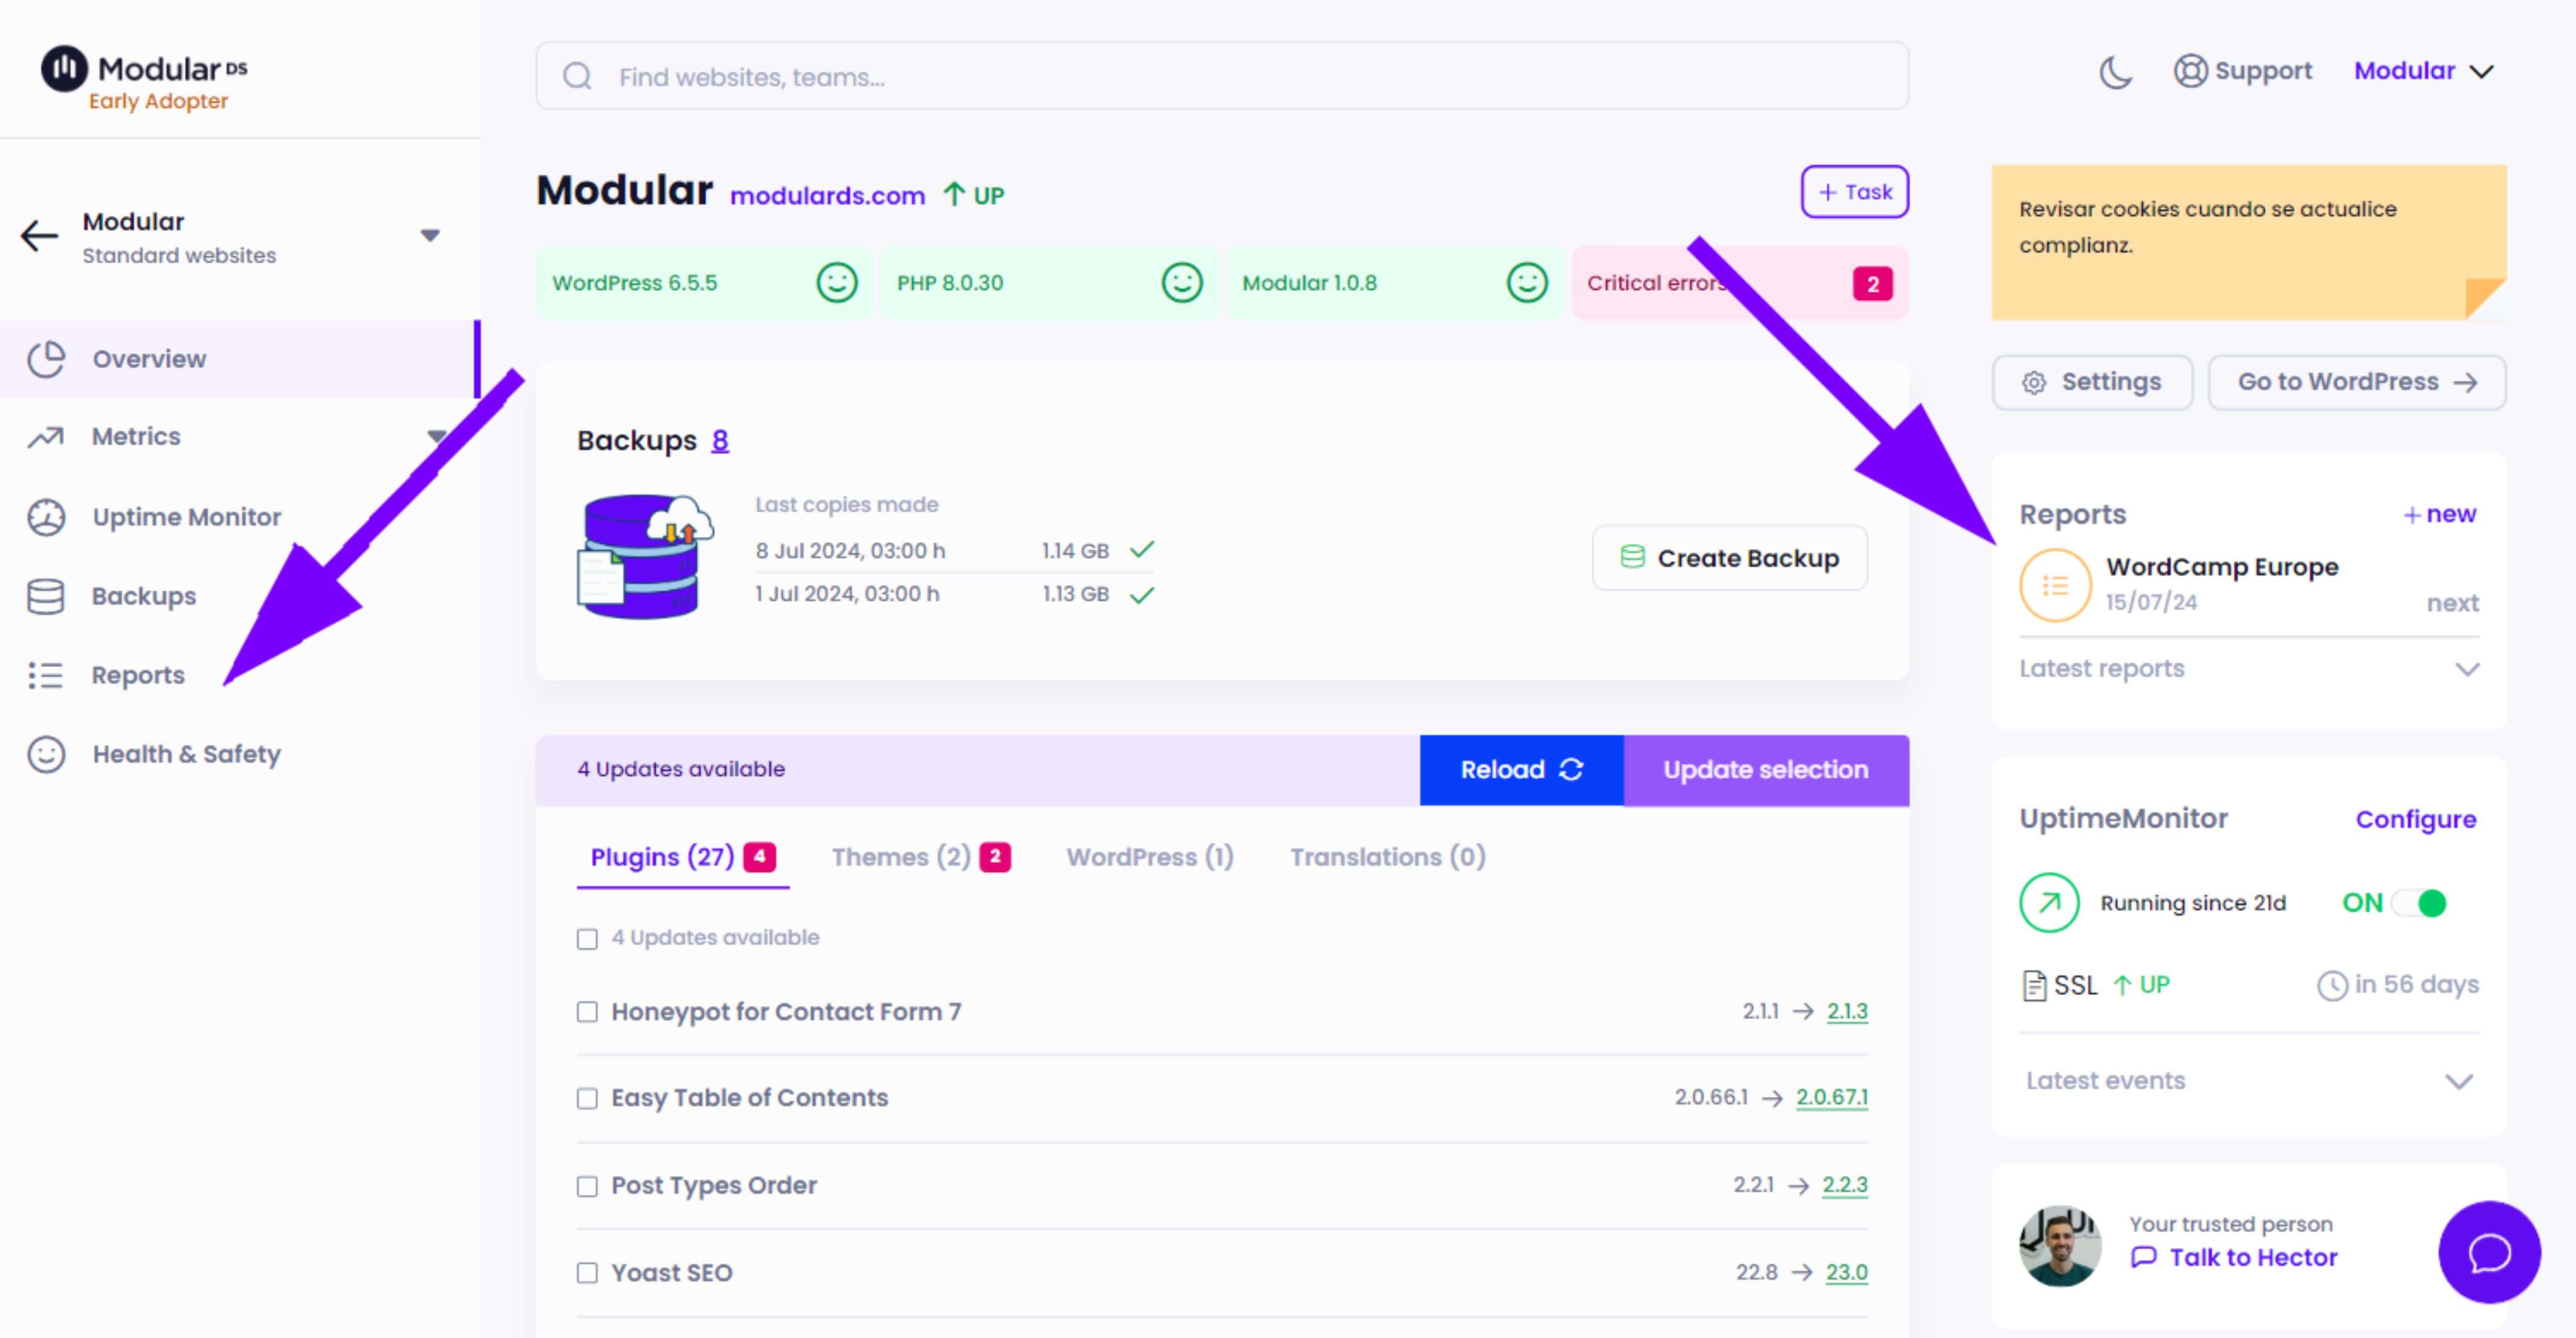
1. Go to the reports module of your website from the left side menu or from the reports widget that you can find in the web panel.

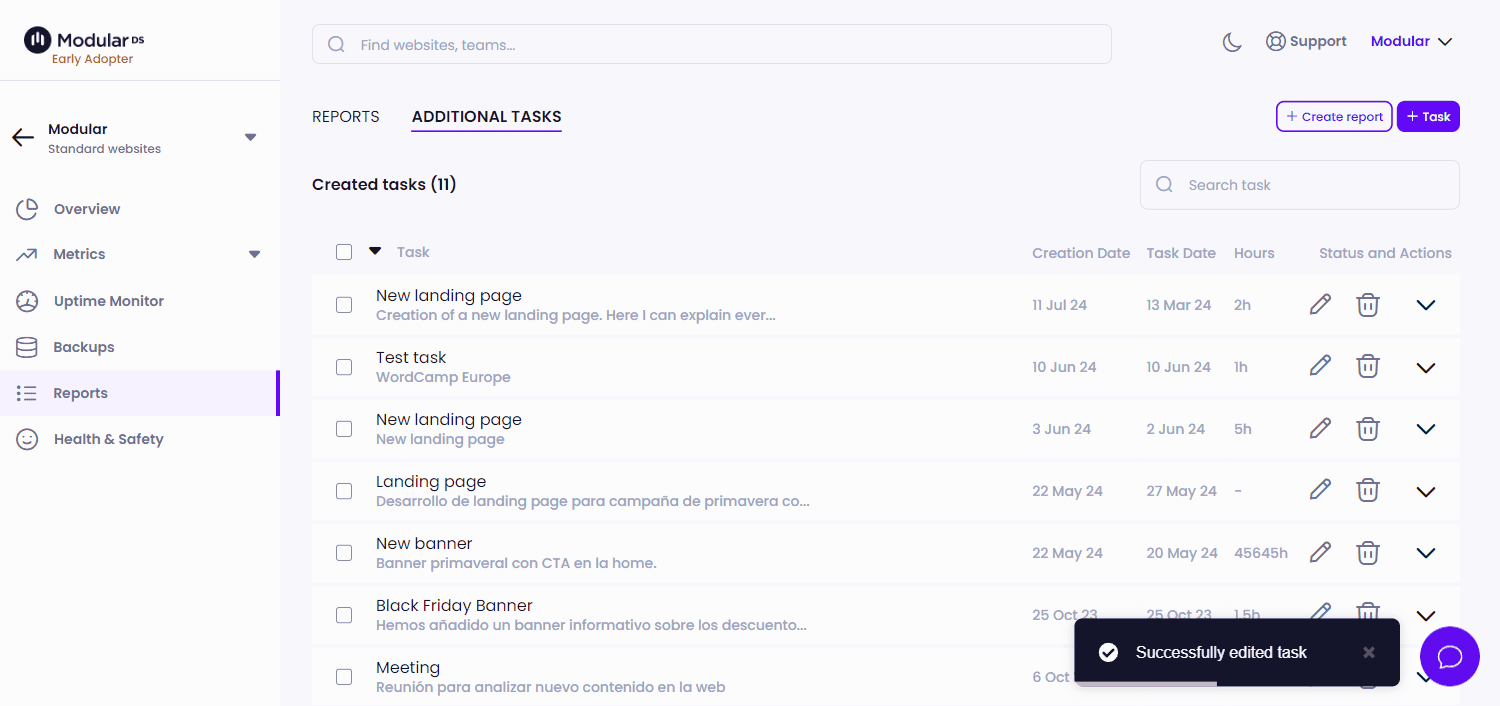
2. In the upper tabs within reports click on “Additional tasks” to access the task manager.
Once inside, you will be able to see a list of the tasks you have added for that website and add new ones or edit existing ones.

Add a task
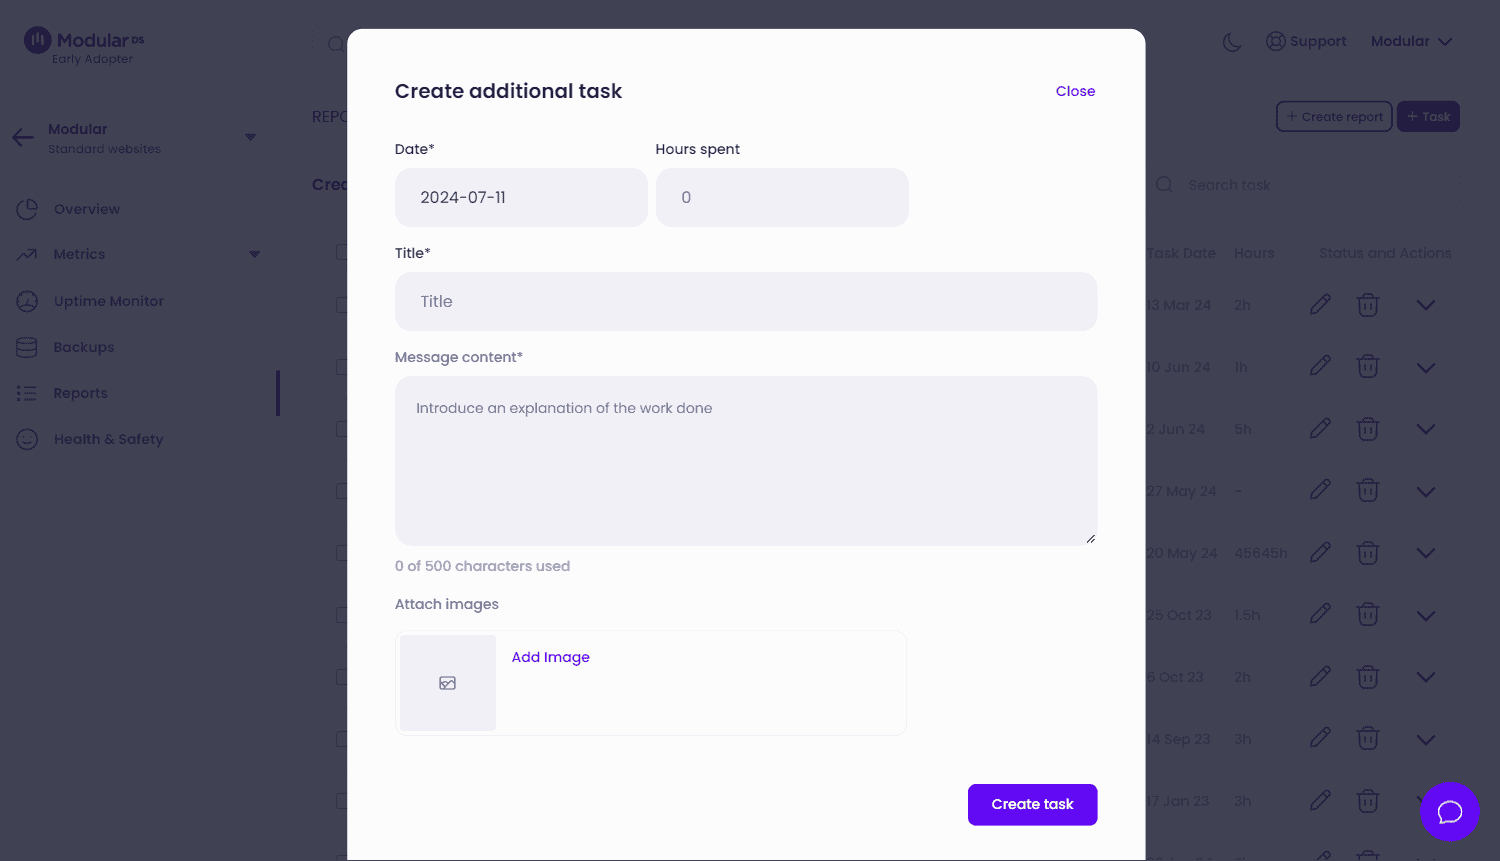
When adding a new one you can include:
-
Task date: Essential to ensure that the task is included in the reports whose date range matches the task.
-
Hours spent: Indicates how much time you have spent on the task. Decimal numbers are allowed for exact accuracy.
-
Task title: Provide a specific name that describes the activity performed.
-
Task description: Write a brief summary of what the task involved and its purpose or impact on the web.
-
Images: You have the option to upload up to four images or screenshots illustrating the task, directly from your computer.

Once the task has been added, you can edit it again at any time from the task list.
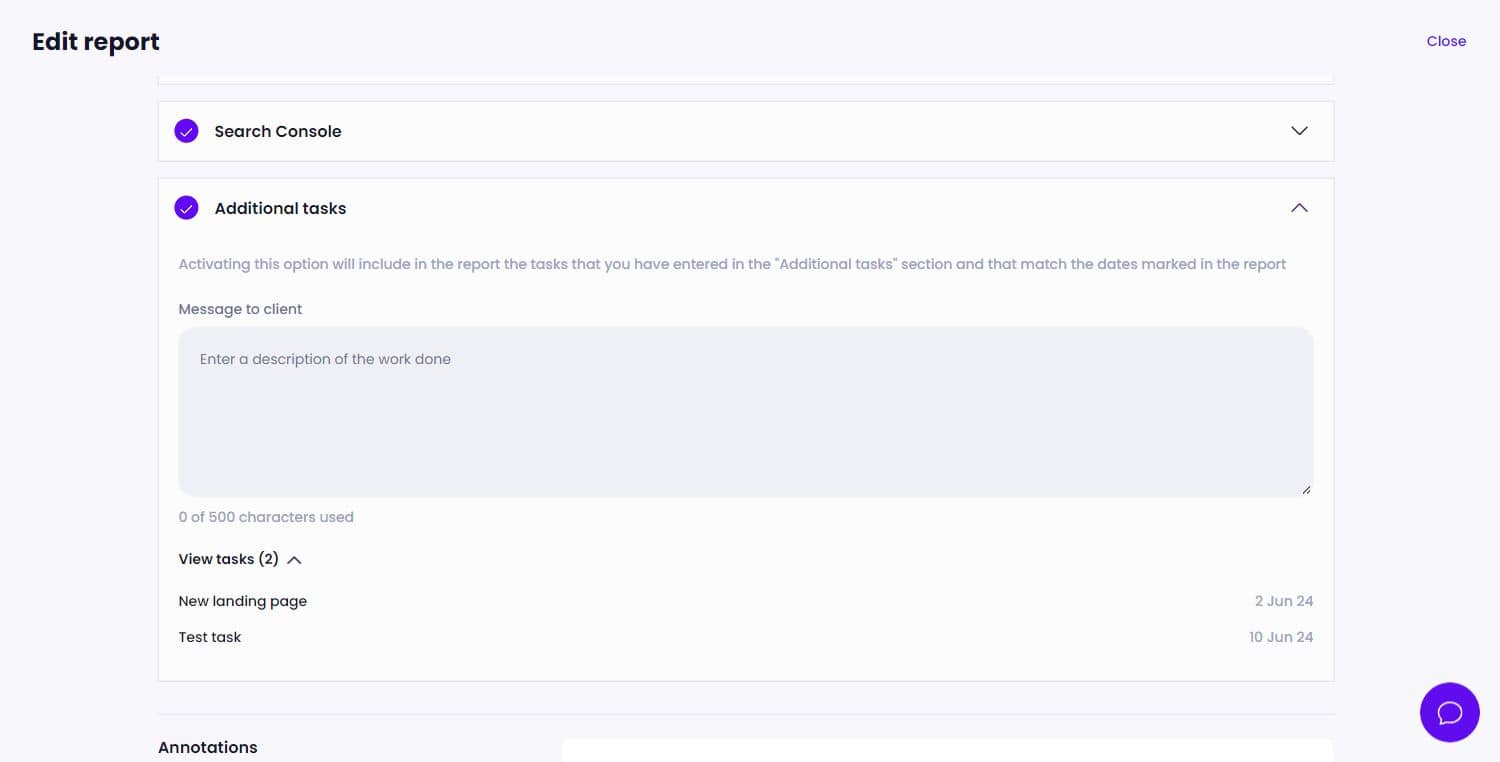
When you create a report, either a one-off or scheduled report, and you select to include the “Additional Tasks” module, the tasks that match the report period will be displayed automatically, provided you have enabled this option in the report settings.

Through this method, your reports will capture not only the automatic operations but also the manual and custom work you have invested in the website, offering a complete and detailed view to your clients.
